Est. reading time: 14 minutes

Dedicated Servers
High-performance, bare-metal, dedicated servers with root, IPMI and RMM access.
Container VPS Hosting
Virtual servers give you the dedicated server experience affordably.
Linux Virtual Machines
Cloud-based Linux virtual machines powered by KVM.
Windows Cloud Servers
Windows virtual server hosting within the cloud for fast reliable connectivity.
Managed cPanel Servers
Managed cPanel cloud server hosting with priority support and daily backups.
Managed Colocation New!
Secure hosting for your critical infrastructure.
Accounting Software Hosting New!
Efficient, cloud-based hosting for accounting software.
Web Hosting
Take your idea or business online today with our shared web hosting solutions.
Email Hosting
Let your customers know they are dealing with a legitimate business by using a custom email address.
Site Builder
Build your own website online with our easy drag and drop website builder.
LiteSpeed Hosting
Accelerated LiteSpeed hosting with improved performance for your website, blog or online shop.
WordPress Hosting
Build your WordPress website with thousands of plugins and themes to choose from.
Register a domain
Search for and register your domain today.
Transfer your domain
Transfer your existing domain to us.
Domain prices
View prices for all domain registrations, renewals and transfers.
WHOIS Lookup
Lookup every single domain currently registered in the world.
VPS Reseller
Becoming a VPS reseller is a great way to earn money.
Reseller Web Hosting (WHM)
A great way to earn money and build your own web hosting company.
LiteSpeed Hosting Reseller
Advanced server-side caching to accelerate your LiteSpeed enabled websites
Domain Resellers
Resell Domains and profit from our large reseller rebates.
Acronis Online Backup Reseller
Become an Acronis online backup reseller to maximize your revenue.
Login
Log in to your personal HOSTAFRICA account
Register
Don't have an account yet ? Create a new one
Forgot Password?
Recover your account password
Move to HOSTAFRICA
Free cPanel to cPanel and domain name transfers with any new plan!
Announcements
All the latest from HOSTAFRICA
Knowledgebase
Browse our knowledge base to get help immediately.
Network Status
Network issues & scheduled maintenances
Contact us
Need other help with your HOSTAFRICA account?
Blog
Find our latest news, guides and tutorials here.
You’ve been toying with the idea of starting a blog for some time, but you’ve either been putting it off for “next week”, aren’t sure how to start one, or waiting for the right moment. Let’s put that to bed right here, because this is the sign you’ve been looking for telling you to set up your own blog.
Starting a blog is not the hardest thing in the world – in fact, we’ll guide you through it to show you how simple it actually is to get going. What gets most people is being consistent. As with any diet, training program, or life in general, if you aren’t consistent the chances of seeing results are incredibly low.
This article is Part 1 of a four-part series we’re writing on everything you need to create your own blog and grow it into a business. We’ll walk you through it one step at a time:
Before you decide anything about your blog, you’ll need to pick a topic that you’re passionate about, have expertise in, and can produce a steady flow of content for years to come.
If you’re interested in vintage 5th century African weapons, you may find some difficulty with regards to your audience size, as they may only be interested in vintage 4th century African weapons.
Be sure that there’s enough interest in your topic by doing some research. You can use tools like Google Trends and Exploding Topics to guide you.

The internet is an ocean of content. If your topics are too broad and provide no real depth or value, you run the risk of getting lost as a drop in the ocean. Remember: There are probably thousands of blogs talking about the exact same thing you are, all with unique perspectives and experiences.
Finding your niche helps you focus and shape your content in your own unique way that will help you stand out. It will become your brand, your blog identity. But it takes more than that.
Anyone can create a blog with their own ramblings and tangents that has no substance to it – you don’t want that. Platforms for that already exist in the shape of Facebook and Twitter.
If you want to give yourself the edge, you need some in-depth knowledge to garner authority, especially if you’re writing about vintage African weapons. You want a blog that is reputable and offers useful, quality content. “Awesomeness”, as Google’s John Mueller puts it.

Being an expert in your niche ensures you bring value to your readers that the competition doesn’t. This is important for readers and search engines alike.
In terms of audience, you want to draw a loyal readership who will come to associate you with good quality content, and even become customers. make sure you get to know them and what exactly they want.
In terms of search engines, keep in mind is that your blog will only be as good as it ranks on Google. Google ranks content that is most useful and relevant to searchers the highest. You want to show Google you provide consistently good quality content and should be rewarded for it.
You’ve figured out your niche and passion, so now it’s time to give your blog a name and get it a home.
Don’t overthink it, but your blog name will be the spot that your audience or people in your niche refer to when talking about that topic. Think of it as your favourite coffee shop or bar. When someone wants to grab a drink with you, you suggest your local watering hole and they’ll know what to expect for the most part.
Your blog works in a similar way. When someone starts talking about the efficacy of a sword in battle (as one does), a reader will mention your blog name and invite others to check out the details on those ancient African weapons. It’s important then that your blog name encompasses the brand you hope to own, especially when your niche may have plenty of competitors.
Along with encompassing your brand, the domain name for your blog also needs to be available on the web. Think of your blog as a person looking to find a home to stay. They can’t stay in a house that’s already occupied so they need to find a vacant house in which to settle. The same goes for your domain name. For example, you can’t use the domain name HOSTAFRICA.ng because this blog already lives there.
You can use our WHOIS Lookup Tool to scour the web for available real estate. Once you’ve found a name that checks both the brand and web availability box, you need to secure a web host for your blog.
Fortunately, you happen to have stumbled upon one of the top-rated web hosting companies in Africa. We offer a variety of hosting options:
Our most affordable type of hosting. You’ll get all the essential resources you need to house and manage you’re your blog. This plan starts at R79/month.
We use Litespeed WordPress servers that are hosted in South Africa to ensure low latency and seamless viewing for your readers. We also automatically scan and repair any vulnerabilities and do daily backups, so your blog stays secure. If you’re looking to get your blog off the ground, this is the plan for which you should opt. It starts at R99/month.
Deigned to be compatible with WordPress, WooCommerce is an open-source customisable plugin that is perfect for running online stores. It takes almost no time to set up and is powerful enough to ensure you can turn your virtual “out for tea 15 minutes” sign around to “open for business” 24/7. Get it for only R99/month.
Any of our plans offer 24/7 technical support so if you need a hand, don’t hesitate to reach out and contact us. We also include a free SSL certificate and a 30-day money back guarantee.
Once you’ve decided on your plan, blog name, and domain name, get in touch with our support team and we’ll finalize the rest for you.
Now that most of the technical work is out of the way, you can install WordPress. This is the content management system (CMS) you’ll be using to personalize your blog, upload content, and most importantly: write!
Here at HOSTAFRICA we use a world-leading web host control panel called cPanel. cPanel uses a handy 1-click application installer called Softaculous to make this process a breeze.
Log in to your cPanel dashboard by entering your domain name into your web browser URL bar followed by port 2083. It will look like this:
https://yourdomain.co.za:2083
Once logged in, scroll down to the bottom of the page and find the section called Softaculous Apps Installer. Look under Scripts for WordPress and click it.

Once in the Softaculous installer, hit Install Now at the bottom of the page.

In Software Setup > next to Choose Installation URL, choose https:// for Protocol and choose the domain you want your website to appear on. Leave In Directory blank.
You can choose a theme later, we will show you how below.
Lastly, at the bottom of the page, enter your email that you want your login details sent to, then click Install.
Your website will take from 10 minutes to an hour, or a couple, to propagate over the internet and show up on your domain.
Note: If your host does not use cPanel, follow this guide from WordPress.org on How To Install WordPress, then proceed with the next step.
There are other CMS’ available, but we suggest WordPress because it is user-friendly, has a wide range of resources, and is compatible with almost any website or style you want for your blog.
For example, if you wanted to focus your blog primarily on taking pictures of bugs you found in your neighbourhood with short captions, you’d be able to do that. While if you wanted a sleek look that focused on written content, you’d find a theme and style that would suit that too.
Once WordPress has been installed, you can start decorating. The different designs for your blog are called themes.
Off the bat, your default blog theme is going to resemble a peanut butter sandwich with no peanut butter. This section will serve as a guide so you can toast your sandwich and add jam for a simple, but elegant finish.
When you start browsing the themes section you can easily be overwhelmed by the sheer number of themes and the possibilities they present. There are thousands of themes available for your choosing, some of them are free, while others are premium and require some spending to acquire them.
To help you along with the myriad of options, you can refer to your niche and find what would suit that best. For example, if you’ll be blogging about ancient Egyptian culture, you might want a shade of yellow, beige, or desert sand brown. This will match the ambience of your blog and, along with your writing, might take your readers back 4000 years to when the pyramids were built.
Some other things to consider when choosing your theme:
Depending on how much you have available to spend on themes, you could opt for a premium theme. Free themes are good to become accustomed to the CMS, but their features and functionalities are often limited. Premium themes can be pricey so be sure to check everything you’re getting and compare it to other themes in the same price range
While you do want your blog to be unique, you don’t want it covered with unnecessary features and widgets. It may sound great to have many things included in your theme but staying clear on what you want your blog to accomplish and getting features that accommodate that is perfectly fine.
If you aren’t going to be focusing on photography a theme that highlights photography-based content won’t be doing much for your blog.
You’ll also want to find a theme that has a responsive design. People will be accessing your blog from all sorts of devices, many of them will be mobile, so you want a theme that adjusts its size to the screen of the visitor. Google’s bots now only crawls websites with a mobile crawler, so if your site is not mobile friendly you may as well write in your diary.
Plugins are add-ons for your website or theme. You get a theme that can accommodate plugins so you can upgrade your theme’s performance. Plugins also give some additional features which can be useful for you blog, like Yoast, Mail Chimp, or Ninja Forms.
Now that you have an idea of what you want in a theme, follow these tabs while in the WordPress dashboard to add a theme to your blog: Appearance > Themes > Add New > Install.
You’ll find a repository of themes once you click Add New. From there you can browse for the option that meets the requirements of your blog. After you find the right one, click install.
If you found a theme you like elsewhere and have the theme downloaded onto your hard drive, you can upload it following these prompts: Appearance > Themes > Add New > Upload Themes.
The Upload Themes button is at the top of the page. Once you’ve located the .zip file on your device, click install then activate it.
Now that you’re up and running with your theme, you can customize the design of your website. This goes without saying (that’s why we’re not saying it), but your theme should represent what your blog hopes to achieve. So, if you’ll be doing plenty of writing, your theme should align with and compliment that.
If your theme is lacking in any specific aspect, try and find a plugin for it that makes it more rounded. For example, if you’re sold on a certain theme but it does not offer any contact forms or SEO tools, you can always add one. As with themes, some are free while others are premium. Try not to add to many plugins as that will cause your website to load longer.
It can be fun customizing your theme’s design in terms of aesthetics and plugins, but don’t forget the purpose of your blog. A host of unnecessary plugins will just add clutter to your blog and cause it to have a slow load time.
Some nifty plugins to install:
This plugin turns your website into an ecommerce store. It comes with a range of features, but to enjoy the full range of functions you’ll need a domain name and website hosting.
Your standard contact form plugin that allows your readers to offer their thoughts and interact with you.
One of the most popular plugins for WordPress, Yoast SEO takes you through standard SEO checks for each blog post, so audiences know your content is relevant to what they are searching for.
This plugin offers a range of features, from security to optimization.
This handy tool optimizes images to help your site load faster. An especially handy plugin if you plan to include plenty of images on your blog
To add a plugin, navigate from the WordPress dashboard to Plugins > Add New > Install.
If you’re uploading a plugin the prompts are roughly the same. Plugins > Add New > Upload Plugin.
Once the skeleton of your website has been structured, you can now add some meat. Some themes will come with pre-made pages, but more often than not you’ll want to create some of your own to help people navigate your website seamlessly.
Think of a page as a shelf, and any posts that fall under that page as the items for sale on that shelf. If there was no shelf all the items would be scattered around, and people wouldn’t know where to find what they’re looking for. So, when creating a page, make sure it’s related to the posts that’ll be settling there.
Your standard pages will include a homepage, about page, and contact page. Depending on what your plan is for your blog you could add a few more.
You can create a page by navigating to the WordPress admin area. Once there, click Pages > Add New. You’ll be able to edit the content for the page you want to create and structure its design.
Remember: pages will, for the most part, be static. You can update or edit them as you go along, but information present on a page will generally be constant, such as your contact details or the ‘about’ section of your website.
Security is the one thing on which you should not compromise. Ensuring that your website offers the necessary security and safety features will create tons of trust for your readers (or customers if you plan to run a store) and show your reliability.
Of course, 100% security for your website is not realistic or viable. Bad actors and hackers will always try their luck, regardless of the systems you have in place.
WordPress addresses security like this:
“Fundamentally, security is not about perfectly secure systems. Such a thing might well be impractical, or impossible to find and/or maintain. What security is though is risk reduction, not risk elimination. It’s about employing all the appropriate controls available to you, within reason, that allow you to improve your overall posture reducing the odds of making yourself a target, subsequently getting hacked.”
WordPress.org
Think of securing your website as adding locks, burglar bars, and security cameras to your home. While all those systems deter criminals, you know very well that it is not a guarantee that burglars won’t target your home.
When, however, they’re on the lookout for a target, the house three doors down with the backdoor open will be a likely option.
An excellent question. There are a number of things you can do to tighten security in and around your website, and we don’t mean brandishing those vintage African weapons at visitors as they enter.
Instead, you could secure your login details or procedures, install security plugins, conduct regular security scans, or keep your website and plugins up to date. Preferably you’d want to do all of those and a bit more.
Here are some things you can do to make your WordPress blog more secure:
One of the first and best things you can do is using a strong password. You may think your name with three numbers is secure, and it might be if it were only a human doing the guessing, but hackers use programs that run through thousands of passwords a second. A password like “Myname123” would be a cake walk for a determined criminal.
If you’re hosting your website with HOSTAFRICA, you’ve got nothing to worry about here. If not, you want to ensure the hosting service you use prioritizes security and goes the extra mile to protect your information.
Online scoundrels are always looking to exploit a possible weakness, and developers are constantly working to limit those weaknesses. It’s a vicious cycle, but one that you’ll come to appreciate (the developers’ part at least). Updates for WordPress and plugins patch vulnerabilities and bugs from previous versions.
These are, of course, are standard operating procedure. You want to find a plugin that is reputable and also provides a wide range of security features. An important note is that you should only install plugins and themes from trusted sources. Stay far away from “free/premium themes and plugins” on dodgy sites as they often have backdoors baked into the code which allow hackers to stroll into your blogs’ home and hang up “For sale” signs before robbing the place dry.
Same as you check all the doors are locked before you nod off for the night, you should do regular security scans of your website to ensure everything is up to standard. There are a few plugins that can take care of this for you. The security plugin you install will likely have an option to run scans on your website.
You’ve done all the essentials and your website is up and running. With all the technical stuff out of the way, you can unleash the host of post ideas you have for your website. We’re sure people are dying to know more about 5th century African weapons.
Stay tuned for Part 2. How to create awesome content for your blog.

Learn how ISO 27001 standards can help you better prepare for targeted attacks and improve your business' cyber security.

This multi-purpose list of AI tools will help boost efficiency, save costs, and shave hours off everyday tasks.
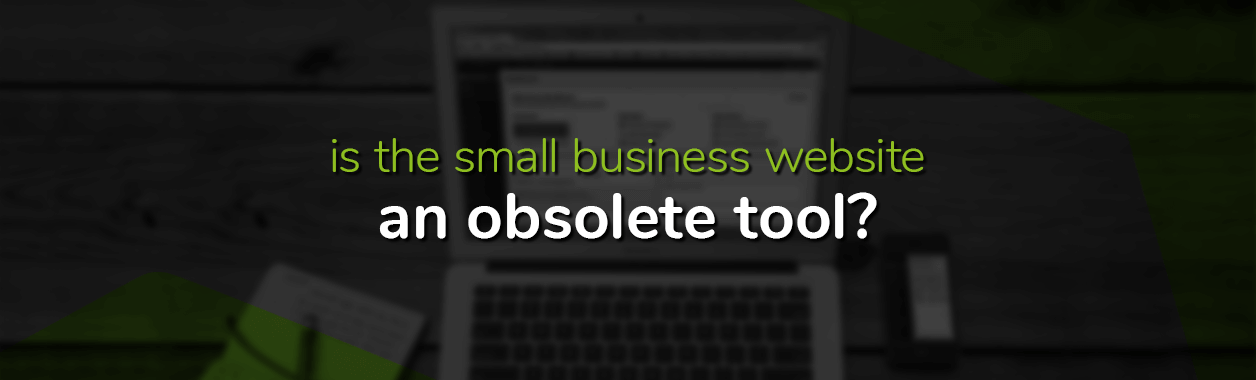
Is a small business website still a good way to market your services online? Is it worth the investment? Read to find out.