Est. reading time: 7 minutes
Dedicated Servers
High-performance, bare-metal, dedicated servers with root, IPMI and RMM access.
Container VPS Hosting
Virtual servers give you the dedicated server experience affordably.
Linux Virtual Machines
Cloud-based Linux virtual machines powered by KVM.
Windows Cloud Servers
Windows virtual server hosting within the cloud for fast reliable connectivity.
Managed cPanel Servers
Managed cPanel cloud server hosting with priority support and daily backups.
Managed Colocation New!
Secure hosting for your critical infrastructure.
Accounting Software Hosting New!
Efficient, cloud-based hosting for accounting software.
Web Hosting
Take your idea or business online today with our shared web hosting solutions.
Email Hosting
Let your customers know they are dealing with a legitimate business by using a custom email address.
Site Builder
Build your own website online with our easy drag and drop website builder.
LiteSpeed Hosting
Accelerated LiteSpeed hosting with improved performance for your website, blog or online shop.
WordPress Hosting
Build your WordPress website with thousands of plugins and themes to choose from.
Register a domain
Search for and register your domain today.
Transfer your domain
Transfer your existing domain to us.
Domain prices
View prices for all domain registrations, renewals and transfers.
WHOIS Lookup
Lookup every single domain currently registered in the world.
VPS Reseller
Becoming a VPS reseller is a great way to earn money.
Reseller Web Hosting (WHM)
A great way to earn money and build your own web hosting company.
LiteSpeed Hosting Reseller
Advanced server-side caching to accelerate your LiteSpeed enabled websites
Domain Resellers
Resell Domains and profit from our large reseller rebates.
Acronis Online Backup Reseller
Become an Acronis online backup reseller to maximize your revenue.
Login
Log in to your personal HOSTAFRICA account
Register
Don't have an account yet ? Create a new one
Forgot Password?
Recover your account password
Move to HOSTAFRICA
Free cPanel to cPanel and domain name transfers with any new plan!
Announcements
All the latest from HOSTAFRICA
Knowledgebase
Browse our knowledge base to get help immediately.
Network Status
Network issues & scheduled maintenances
Contact us
Need other help with your HOSTAFRICA account?
Blog
Find our latest news, guides and tutorials here.
Kubernetes (k8s) is an open-source, cloud-native, container orchestration and management platform. It’s the go-to way to automate the deployment, scaling, and maintenance of containerised applications across different nodes. From service discovery to auto-restarts, and from resource allocation tracking to compute utilisation and scaling; a well-configured k8s cluster can manage a lot on its own.
Got Ubuntu on your VMs? Learn How to install Kubernetes and deploy a cluster with Docker on Ubuntu 18.04
A Kubernetes cluster consists of a Master and at least one to several worker node(s). The Master is the virtual machine (VM) that administers all activities on your cluster. A node is a VM that serves as a worker machine in your k8s cluster to host running applications.
We strongly recommend you only use VMs aka Cloud Servers to run Kubernetes, not system containers aka VPS, as these can cause issues with k8s.

A node is comprised of the Kubelet, a container runtime, and the kube-proxy. The k8s installation’s three core modules: Kubelet, kubeadm, and kubectl are agents that control the node and communicate with the Kubernetes Master.
Once they have been installed and other configurations done, you will be able to create your first k8s cluster. You can manage this cluster from the command line on your kubemaster node.
Every Kubernetes instance runs on top of a container runtime, which is software responsible for managing container operations. Containers in this case are not virtualised servers but rather a solution that packages code and dependencies to run a single application (service) in an isolated (containerised) environment, essentially disassociating applications from the host machine.
The most popular and recommended one is Docker, and it’s the one we will use for the purpose of this guide. However, if you want to install a different underlying container runtime, you can harness the power of the Container Runtime Interface and use basically any runtime you want.
Kubernetes groups containers into pods, its most basic operational unit, which are basically just groups of containers running on the same node. Pods are connected over a network and share storage resources.
In order to connect your nodes or VMs and make them private, make sure to choose a hosting company who provides a Virtual Local Area Network (VLAN) with their VMs. We offer a VLAN add-on to our Cloud Servers for R200 per month.
Prerequisites
sudo or root privileges on every server.sudo yum check-update
sudo yum install -y yum-utils device-mapper-persistent-data lvm2
sudo yum-config-manager --add-repo https://download.docker.com/linux/centos/docker-ce.repo
sudo yum install docker-ce
A successful installation output will be concluded with a Complete!
You may be prompted to accept the GPG key, this is to verify that the fingerprint matches. The format will look as follows. If correct, accept it.
060A 61C5 1B55 8A7F 742B 77AA C52F EB6B 621E 9F35
Now Docker is installed, but the service is not yet running. Start and enable Docker using the commands
sudo systemctl start docker
sudo systemctl enable docker
To confirm that Docker is active and running use
sudo systemctl status docker

Since the Kubernetes packages aren’t present in the official CentOS 7 repositories, we will need to add a new repository file. Use the following command to create the file and open it for editing:
sudo vi /etc/yum.repos.d/kubernetes.repo
Once the file is open, press I key to enter insert mode, and paste the following contents:
[kubernetes]
name=Kubernetes
baseurl=https://packages.cloud.google.com/yum/repos/kubernetes-el7-x86_64
enabled=1
gpgcheck=1
repo_gpgcheck=1
gpgkey=https://packages.cloud.google.com/yum/doc/yum-key.gpg https://packages.cloud.google.com/yum/doc/rpm-package-key.gpg
Once pasted, press escape to exit insert mode. Then enter :x to save the file and exit.

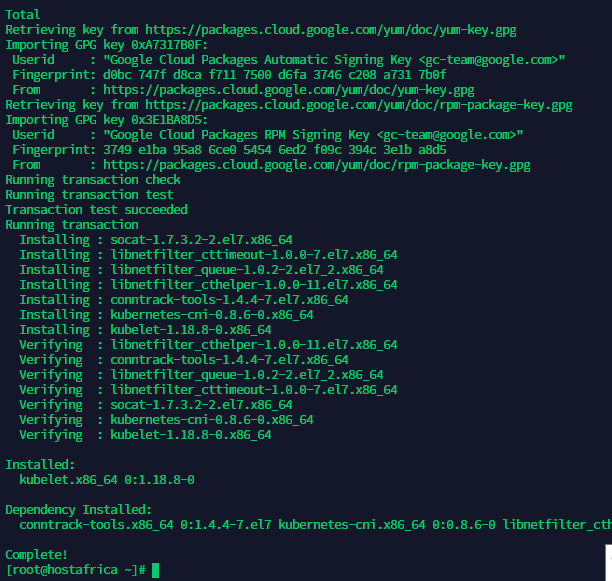
The first core module that we need to install on every node is Kubelet. Use the following command to do so:
sudo yum install -y kubelet
Once you enter the command, you should see a lot of logs being printed. A successful installation will be indicated by the Complete! keyword at the end. See below:
kubeadm, the next core module, will also have to be installed on every machine. Use the following command:
sudo yum install -y kubeadm
Note that kubeadm automatically installs kubectl as a dependency
Successful installation should result in the following output:

On your Master node, update your hostname using the following command:
sudo hostnamectl set-hostname master-node
sudo exec bash
And
sudo hostnamectl set-hostname W-node1
sudo exec bash
Now open the /etc/hosts file and edit the hostnames for your worker nodes:
sudo cat <<EOF>> /etc/hosts
10.168.10.207 master-node
10.168.10.208 node1 W-node1
10.168.10.209 node2 W-node2
EOF
To allow containers to be able to access the file system, we need to enable the “permissive” mode of SElinux.
For these commands to take effect, you will have to reboot
Use the following commands:
sudo setenforce 0
sudo sed -i --follow-symlinks 's/SELINUX=enforcing/SELINUX=disabled/g' /etc/sysconfig/selinux
reboot
To allow seamless communication between pods, containers, and VMs, we need to add rules to our firewall on the Master node. Use the following commands:
sudo firewall-cmd --permanent --add-port=6443/tcp
sudo firewall-cmd --permanent --add-port=2379-2380/tcp
sudo firewall-cmd --permanent --add-port=10250/tcp
sudo firewall-cmd --permanent --add-port=10251/tcp
sudo firewall-cmd --permanent --add-port=10252/tcp
sudo firewall-cmd --permanent --add-port=10255/tcp
sudo firewall-cmd -reload
All your firewall rule commands should output success like below:

You will also need to run the following commands on each worker node:
sudo firewall-cmd --permanent --add-port=10251/tcp
sudo firewall-cmd --permanent --add-port=10255/tcp
sudo firewall-cmd -reload
We need to update the net.bridge.bridge-nf-call-iptables parameter in our sysctl file to ensure proper processing of packets across all machines. Use the following commands:
cat <<EOF > /etc/sysctl.d/k8s.conf
net.bridge.bridge-nf-call-ip6tables = 1
net.bridge.bridge-nf-call-iptables = 1
EOF
sudo sysctl --system
You should get the following output:

For Kubelet to work, we also need to disable swap on all of our VMs:
sudo sed -i '/swap/d' /etc/fstab
sudo swapoff -a
This concludes our installation and configuration of Kubernetes on CentOS 7. We will now share the steps for deploying a k8s cluster.
To launch a new Kubernetes cluster instance, you need to initialize kubeadm. Use the following command:
sudo kubeadm init
This command may take several minutes to execute. Upon success, you should get logs similar to those in this screenshot:

You will also get an auto-generated command at the end of the output. Copy the text following the line Then you can join any number of worker nodes by running the following on each as root: as highlighted in the above screenshot and save it somewhere safe. We will use this to add worker nodes to our cluster.
If you forgot to copy the command, or have misplaced it, don’t worry. You can retrieve it again by entering the following command: sudo kubeadm token create --print-join-command
In order to start managing your cluster, you need to create a directory and assume ownership. Run the following commands as a regular user:
mkdir -p $HOME/.kube
sudo cp -i /etc/kubernetes/admin.conf $HOME/.kube/config
sudo chown $(id -u):$(id -g) $HOME/.kube/config
Pods within a cluster are connected via the pod network. At this point, it’s not working. This can be verified by entering the following two commands:
sudo kubectl get nodes
sudo kubectl get pods --all-namespaces

As you can see, the status of master–node is NotReady. The CoreDNS service is also not running. To fix this, run the following commands:
sudo export kubever=$(kubectl version | base64 | tr -d '\n')
sudo kubectl apply -f https://cloud.weave.works/k8s/net?k8s-version=$kubever
You should get the following output:

And now if you verify the statuses of your node and CoreDNS service, you should get Ready and Running like seen below:

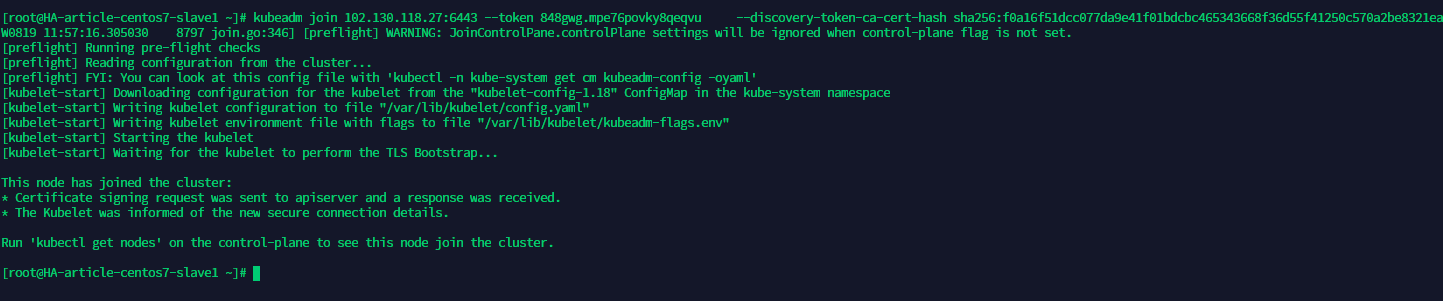
As a final step, you need to add worker nodes to your cluster. We will use the kubeadm join auto-generated token in Step 1. here. Run your own version of the following command on all of the worker node VMs:
sudo kubeadm join 102.130.118.27:6443 --token 848gwg.mpe76povky8qeqvu --discovery-token-ca-cert-hash sha256:f0a16f51dcc077da9e41f01bdcbc465343668f36d55f41250c570a2be8321eac
On successful addition, you should get the following output:
Running the following command on the master-node should show your newly added node.
sudo kubectl get nodes

To set the role for your worker node, use the following command:
sudo kubectl label node w-node1 node-role.kubernetes.io/worker=worker

Now you’re all set up.
Happy Hosting!

Learn how to install Tailscale VPN on Linux and Windows. This comprehensive guide has everything you need to get started!

Learn how to install Kubernetes and deploy a cluster with Docker on Debian 9. Step by step instructions with commands and images.
Learn how to install Kubernetes and deploy a cluster on a Windows server. Step by step instructions with commands and images.